Marketplace Dining Table Flip
This previously unloved table is now the perfect centrepiece in my dining room.
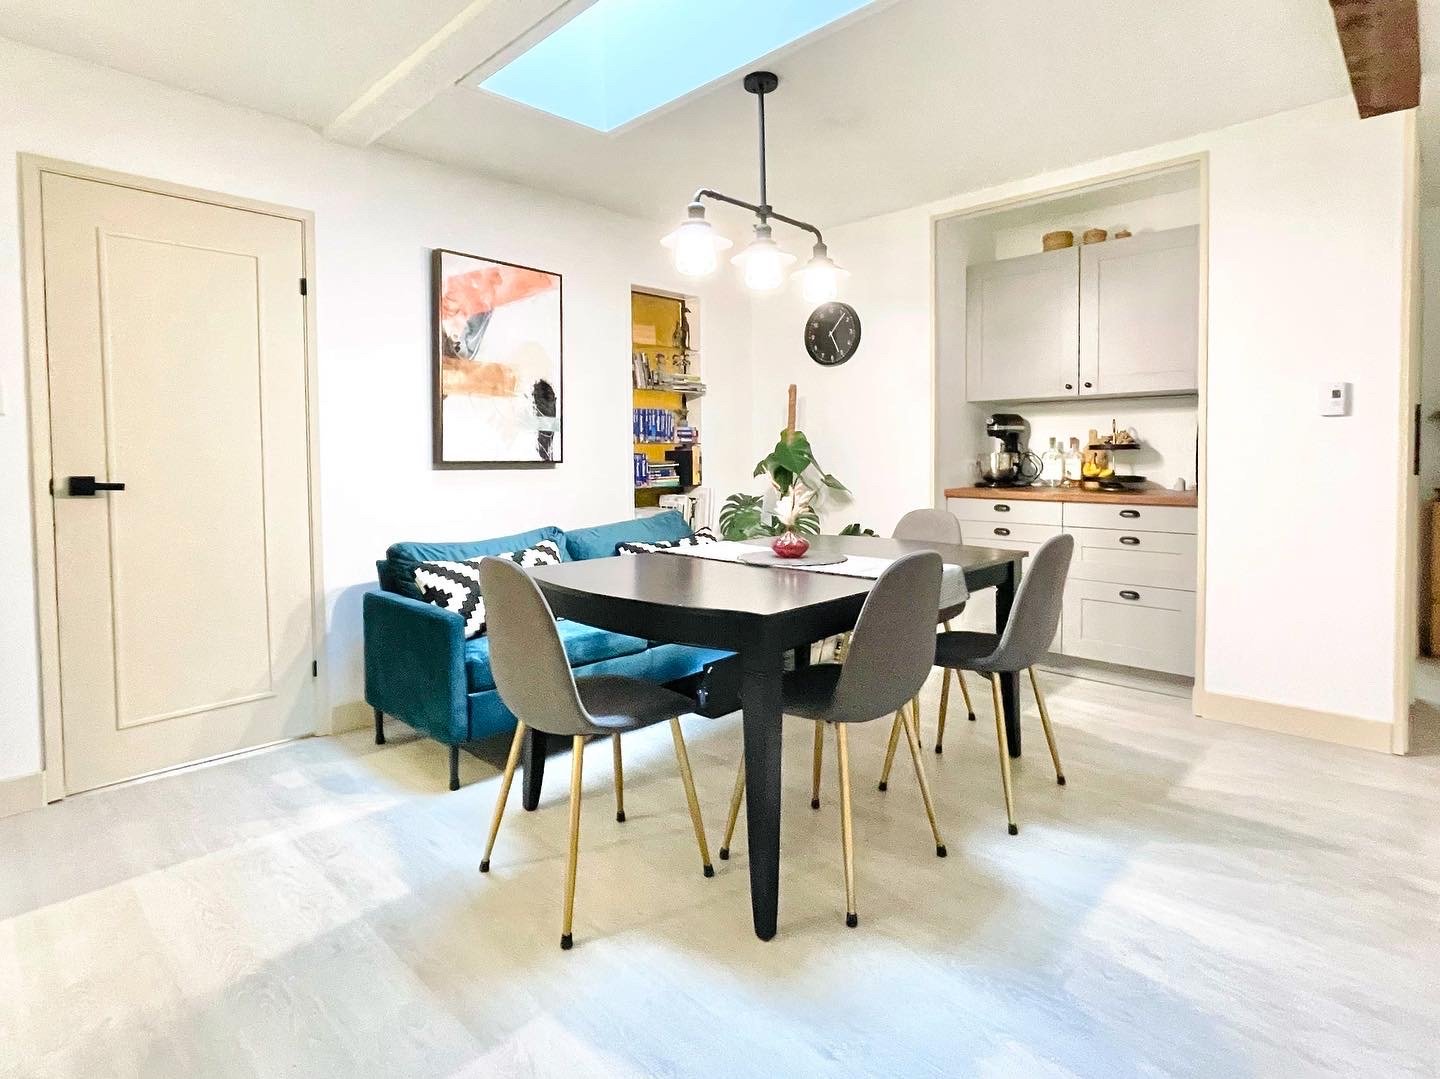
For the past year, I have spent an embarrassing amount of time looking at dining tables.
I have browsed all the most popular furniture sites coveting the most gorgeous tables. While they are all currently well beyond my reach, they did serve as inspiration for the direction I knew I wanted to go design-wise in our dining space.
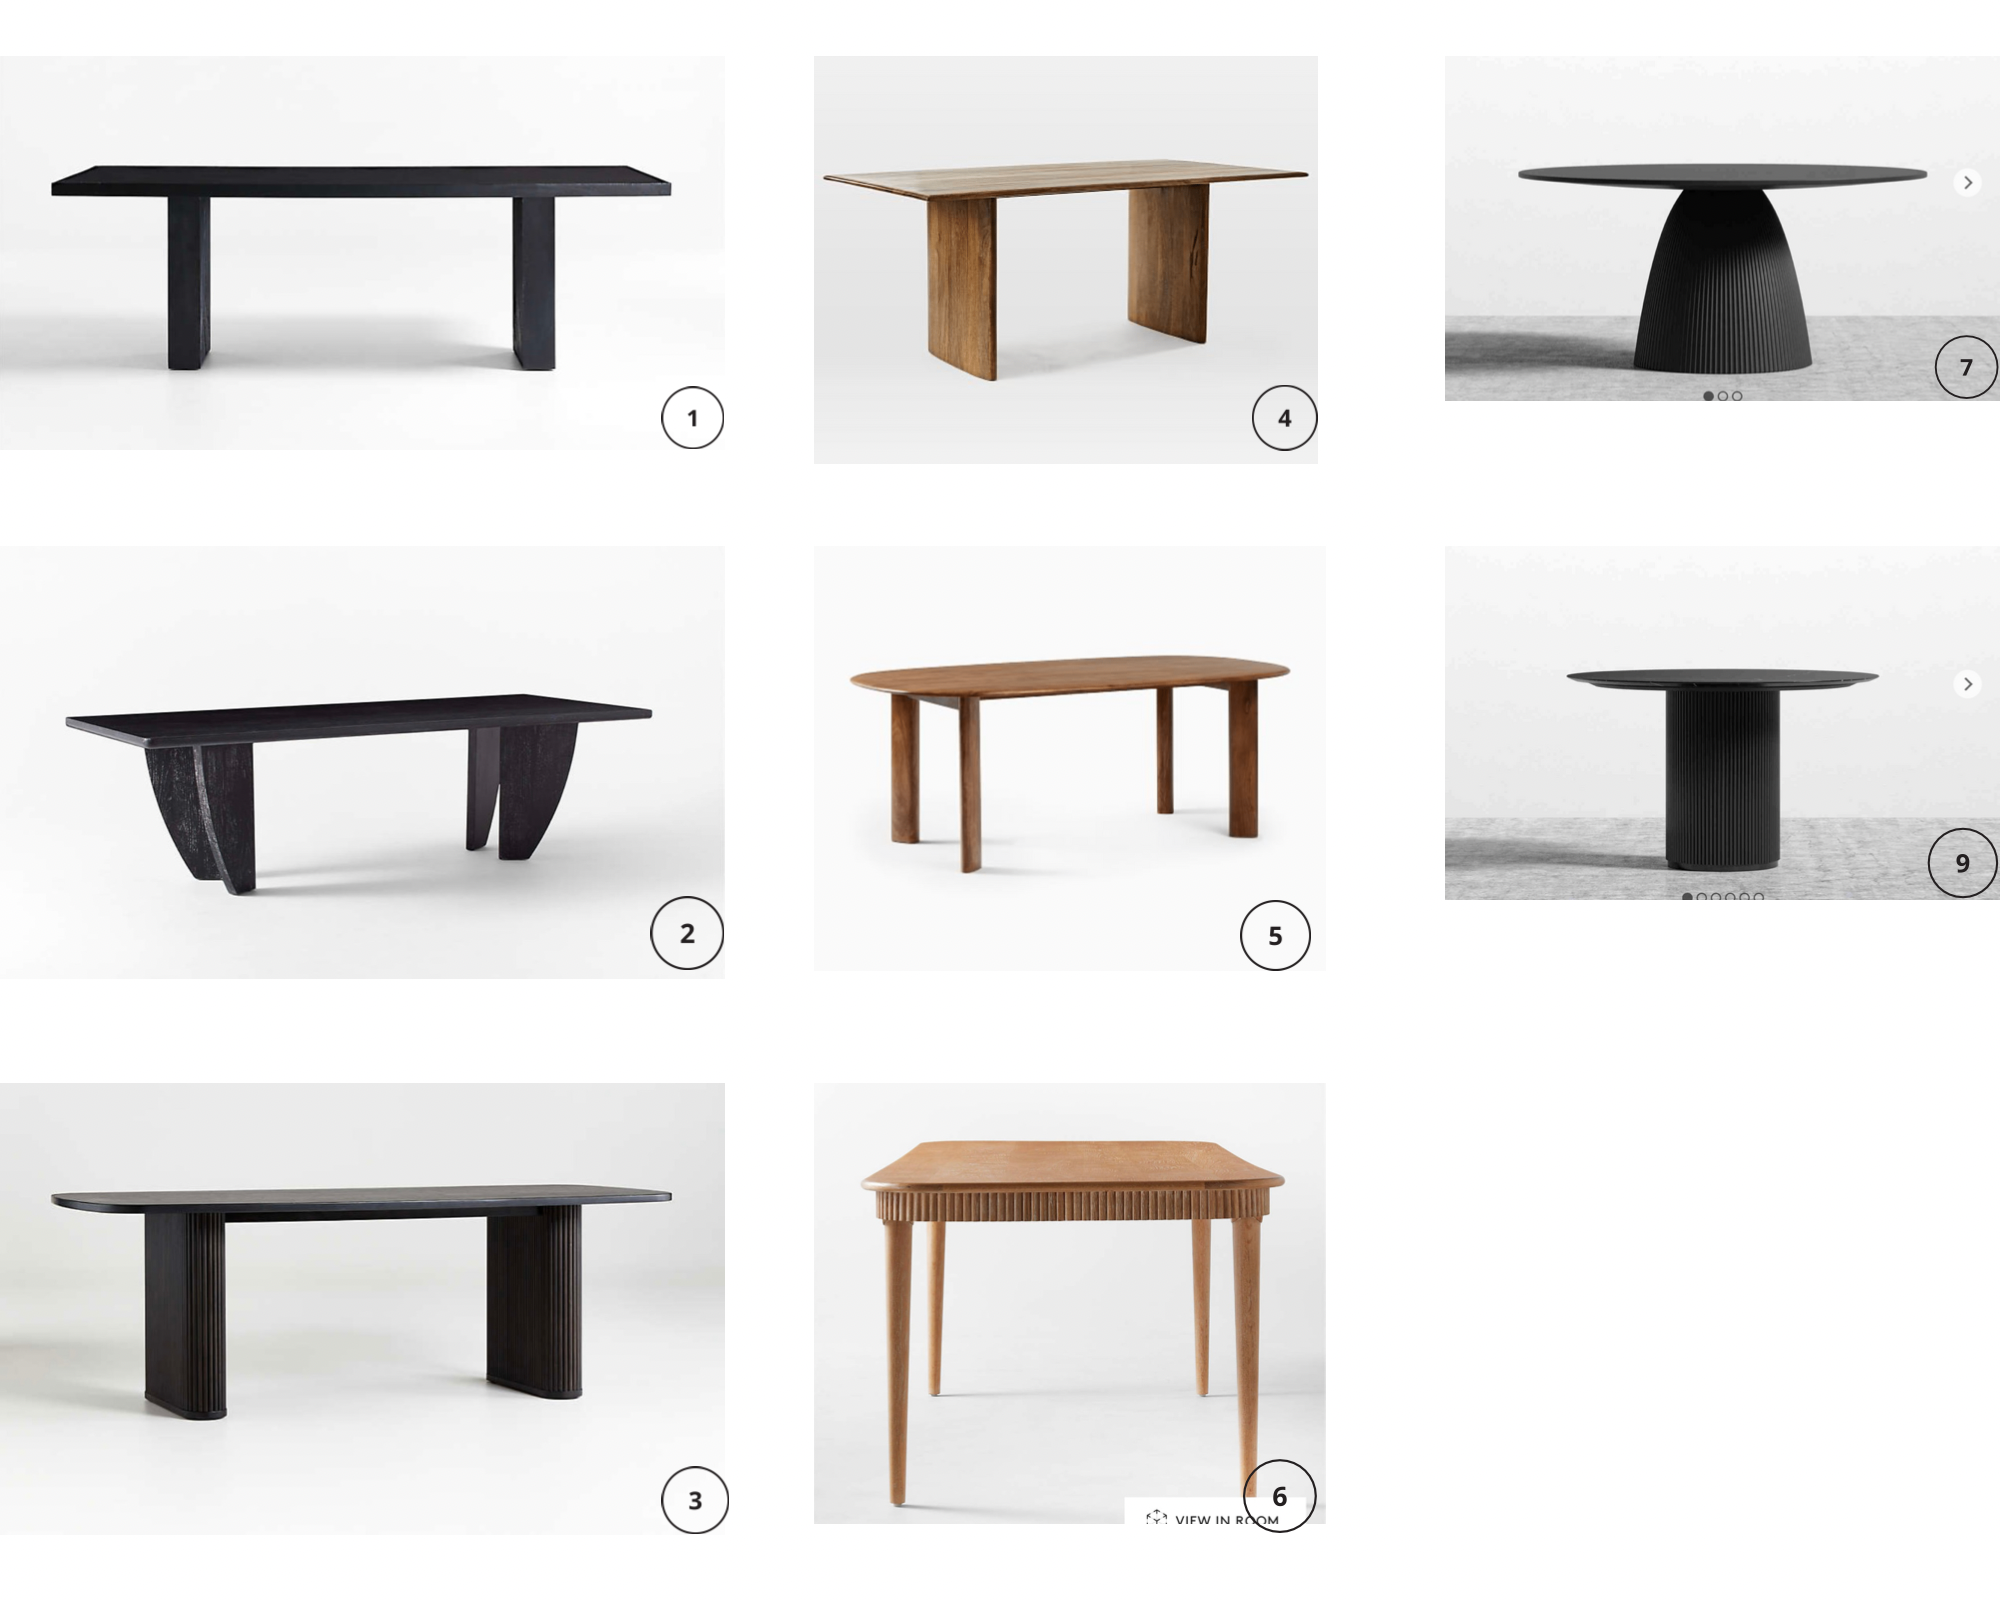
Some of the most beautiful and interesting tables I’ve found lately.
Dunewood Charcoal Dining Table — Crate & Barrel — $2,499
Dunn Rectangular Black Wood Dining Table — CB2 — $2,799
Walton Ribbed Leg Dining Table — Crate & Barrel — $2,399
Anton Solid Wood Dining Table — West Elm — $2,349
Anton Solid Wood Oval Dining Table — West Elm — $2,549
Providence Cerused Oak Dining Table — $2,299
Gallus Dining Table — Rove Concepts — $2,379
Athena Round Dining Table — Rove Concepts — $2,470
Although a brand new table would be amazing, I have felt drawn towards trying my hand at flipping a piece of thrifted furniture. In my many deep dives into the online DIY world, I’ve seen some truly amazing flips and second hand finds, and I have subsequently spent hours upon hours scouring Facebook Marketplace and local thrift stores. Truth be told, I was trying to keep this entire table project, including supplies, under $100. And, after missing out on a few gems and in the throws of Marketplace FOMO (it’s a real thing trust me), I committed to this table sight unseen for $25.

I paid $25 for this sad looking table on Facebook Marketplace
The listing claimed this table was “solid wood” and, in truth, I really should have known it wasn’t, but the pictures in the listing were dark and strategic. As we found out when we picked it up, the legs of the table were wood veneer while the top was laminated particle board - oof!! To say I was disappointed would be an understatement. In fact, on the way home, my husband and I discussed whether we should just keep driving straight to the dump with it. In the end we didn't because… honestly… my pride. I was too embarrassed to let my first Marketplace project piece end in utter failure before I had even started.
I landed on the idea that if we were just going to toss it anyway, I should use the table to practice some of the products and techniques I had been researching. I figured, if it was still terrible when all was said and done, I would have at least learned a thing or two in the process. And, if I somehow managed to salvage it, well then it would be a very happy and welcome surprise. Spoiler 1: it turned out awesome!
It sat like this in our carport for almost 2 months while I worked up the actual courage to try.
At first I ignored it even though I walked by it at least twice a day, every single day. Then, I did a tonne more (redundant and uneccessary) research trying to psych myself up. Side note: If you don’t already know this about me, I have a compulsive need to be over-prepared for literally EVERYTHING. Chalk paint or cabinet paint? What primer should I use? Water or oil-based? Should I seal it with a top coat? Matte or satin finish? How should I sand it? (seriously, those fluted grooves around the skirt of the table top had me CONCERNED). Use a paint sprayer or do it by hand? And on, and on, and on… 60 days later, I pulled up my big girl pants, made some decisions, and I started sanding.

It always looks worse before it looks better.
As is the case with literally any DIY, it always looks worse before it looks better. The trick to properly preparing anything to be painted it to remove the shine. The more dull the finish, the better chance you give whatever you’re painting on to hold nice and tight to the surface. After sanding, if you’re aiming for a “factory finish” like I was, you need to clean your piece really, and I mean really, well. Tack cloths are worth every penny. Any dust left on the surface of the piece will show up in your paint job and could potentially ruin all your hard work — that was not a risk I was willing to take.
Once the clean up was all done, it’s was onto priming. For this project I ultimately settled on Zinsser Bulleye 123 Primer in Grey. I opted for the grey because I knew I was going dark with the paint (if I had chosen a lighter paint colour, I would have used a white primer). I did 2 coats of the primer, sanding between coats with a 400 grit sandpaper. Sanding is sort of optional. I didn’t sand between coats when I did my kitchen cabinets and they turned out OK - but just ok. They’re not terrible, but they could be better too. So, this time around I chose to sand between EVERY. SINGLE. COAT. After every sand, it got a wipe with the tack cloth.

It was too cold for the primer and paint to cure properly, so I finished the table in the very middle of my house, between the living room, kitchen, and dinning room.
For my paint, I went with Behr Alkyd Satin Enamel in the colour “Black” and I did 3 coats in total. And yes, I sanded and cleaned between each coat. To be honest, since this was my first time refinishing a piece and also sanding between coats, the whole process of sanding that freshly dried paint was actually kind of nerve wracking. It felt like I was ruining the beautiful work I had just done. Spoiler 2: I hadn’t.

Two coats of paint complete.
When I finished my third coat of paint, I decided to seal it — my reasoning being that since this was a dining table it would be subjected to pretty high use, so I should give it the best protection I can. If this had been a different piece of furniture, like a display cabinet or small side table that wouldn't get much interaction, this is a step I might have skipped. I opted for Behr Water-Based Poly Urethane in a satin finish and did 2 coats (again, sanding between coats). I did NOT sand after I did the final coat of poly.
As a recap on how to refinish a laminated or veneered piece of furniture (in 21 easy steps):
Sand with 150 grit sandpaper, using gentle circular motions, to remove the shine from the surface (I used an orbital sander for this step)
Use a tack cloth to give it a good clean
Prime using a good bonding primer - allow to dry according to direction to recoat
Gently sand with a 400 grit sanding sponge (all manual sanding from here on out)
Clean with tack cloth
Prime
Sand
Clean
Paint - allow to dry according to directions to recoat
Sand
Clean
Paint
Sand
Clean
Paint
Sand
Clean
Seal with a water-based polyurethane - allow to dry according to directions to recoat
Sand
Clean
Poly
I let the table cure undisturbed for about 3 days. By then, I needed to put my house back together so I threw a cotton table cloth over it when we sat down for meals - making sure everyone was reminded (aka properly scolded) to be very gentle with the table. In addition to adding some protection against knocks, the table cloth is also there to help keep it clean. According to the instructions, you should wait 30 days before cleaning the paint surface with a mild detergent. I did wipe the table down once with a wet cloth because of an accidental food spill and it doesn’t seem to have affected it in any way, but I’m still waiting at least the 30 days to put it through more rigorous day-to-day use. That being said, we’ve been using the table for about 3 weeks and so far everything is holding up beautifully.
If you’ve made it this far and want to know what products I used (and recommend) for this project, here you go:

Nine handy painting tools for any furniture refinishing project.
Dewalt 20V Max XR Cordless Brushless 5” Random Orbital Sander
Bennet Tack Cloth
Zinsser Bulls Eye 1-2-3 Primer in Grey
Bennett 10-pack 4'“ High Density Foam Rollers
Wooster 2” Shortcut Polyester Angled Sash Brush
Behr Interior-Exterior Alkyd Satin Enamel Paint
Wooster Pelican Pail Liner, 3 pack
Wooster Pelican Paint Pail
Behr Fast-Drying Water-Based Polyurethane, Satin
*All products available at Home Depot
The total cost of this project was $132.88*
*Price is for materials only (table, brushes, paint, sanding pads, tack cloths, & sealer) and does not include the cost of tools I already had on hand, like the orbital sander. That said, this project could absolutely be done without an electric sander.